ESBOÇO E FINALIZAÇÃO Sketching and Rendering

---
ESBOÇO E FINALIZAÇÃO
Sketching and Rendering
Por que o esboço é tão importante?
Muitos alunos me perguntam se realmente é necessário fazer um esboço antes de finalizar um desenho. A resposta é: sim, especialmente para quem está começando ou está no nível intermediário. O esboço é o alicerce que garante proporções corretas, fluidez do gesto e uma construção sólida da figura.
Quando você vai desenhar uma pessoa, comece sempre pelo esboço da anatomia. Nessa etapa, priorize:
o gesto expressivo, que dá vida à pose;
as linhas anatômicas principais, que estruturam o corpo.
Se tiver dificuldade no início, não hesite em usar referências fotográficas ou montar a figura com formas geométricas simples — uma técnica que facilita muito a compreensão do volume e da postura.
Antes de iniciar a finalização, faça uma pequena pausa. Voltar ao desenho com um olhar descansado ajuda você a identificar erros de proporção, alinhamento ou anatomia com muito mais clareza. Depois de corrigir esses detalhes, escolha a técnica que vai utilizar e comece pelos traços principais, deixando texturas e sombreados para o final.
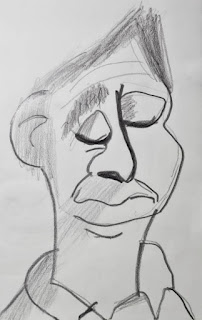
Neste exercício em aula, trabalhamos um modelo sem roupas para entender melhor a construção corporal e, a partir daí, estudar o caimento natural das roupas e suas dobras. Essa abordagem traz mais naturalidade, precisão e elegância ao desenho final.
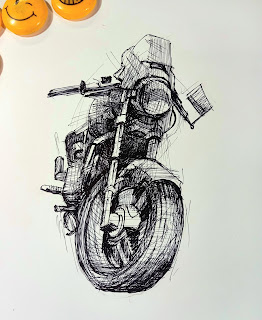
● Técnica de finalização usada: nanquim.
Obrigado por visitar nosso blog!
Volte sempre!
---
Why Is Sketching So Important?
Many students ask me whether it is really necessary to sketch before finalizing a drawing. The answer is: yes — especially for beginners and intermediate artists. The sketch is the foundation that ensures correct proportions, gesture flow, and a solid construction of the figure.
When drawing a person, always begin with an anatomical sketch. At this stage, focus on:
the expressive gesture, which brings life to the pose;
the main anatomical lines, which structure the body.
If you find this difficult at first, feel free to use photo references or build the figure using simple geometric shapes — a great way to understand volume and posture.
Before moving on to the final rendering, take a short break. Returning to your drawing with rested eyes will help you spot mistakes in proportion, alignment, or anatomy much more easily. After making the necessary adjustments, choose your technique and begin by reinforcing the primary lines, leaving textures and shading for the last stage.
In this classroom study, we worked with a model without clothing to better understand body construction and then study how fabric naturally falls and folds. This method leads to more natural, precise, and visually pleasing results.
● Final rendering technique used: ink.
Thank you for visiting our blog!
Come back anytime!
---


Comentários
Postar um comentário